How to Import your Historical Controlled Documents into Egnyte
If you’re a quality professional then you know that maintaining compliance, audit, and tracking of your controlled documents is critical. When you adopt Egnyte’s Controlled Document Management, you’ll have all of the tools to review, approve, release, and train your users on your policies, procedures, and other controlled docs. But what should you do about all of your existing controlled documents?
In this article, you’ll learn how to import your existing SOPs, work instructions, and other controlled documents into the Egnyte Controlled Document Management app.
Why Import Controlled Documents?
Importing your existing controlled documents provides you with a single source of truth for your documents and to remain compliant with regulations and ready for auditor inspections. Import allows you to bring in not just your currently effective documents, but also your obsolete documents along with all of their historical metadata.
How to Import Controlled Documents?
Take the following steps to import your existing controlled documents.
Step 1: Export from Existing Systems
The first step is to export your documents and their associated metadata from external systems. This may simply mean copying the data off of a file server or it may mean downloading them from a document management system. Either way, you’ll want to capture the following for each document:
- The actual file in its various formats, e.g., the original docx file and an approved PDF with signatures
- The functional area or department the document is meant for, e.g., Clinical or Manufacturing
- The type of document, e.g., SOP or work instruction
- The document title
- The effective date range
- The date the document was approved
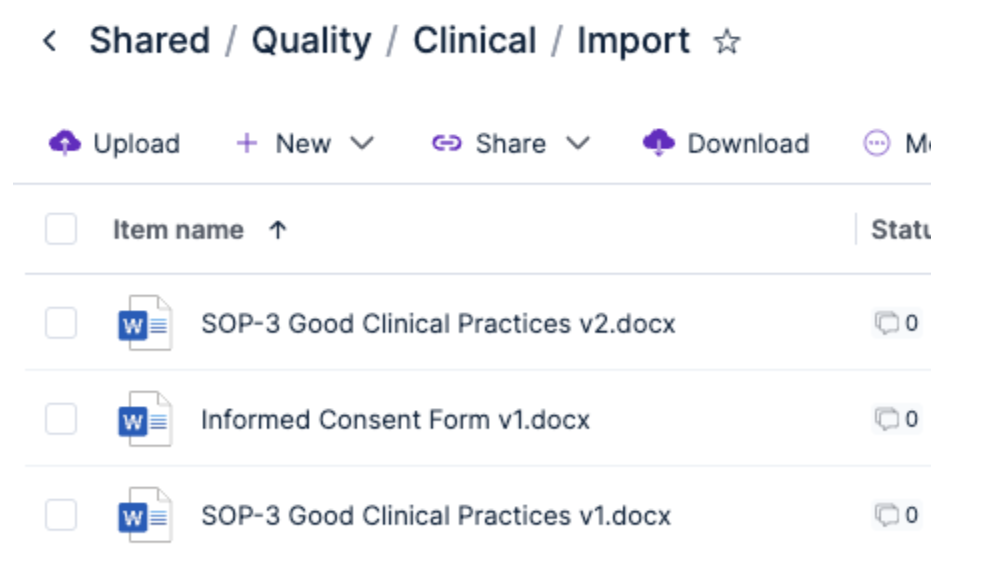
Step 2: Upload the Files to Egnyte
The next step is to upload the files to Egnyte. The best practice is to set up a folder structure for all of your controlled documents organized by category. Most organizations categorize their documents by functional area or department.
You can upload the documents by dragging and dropping them through the Web UI, using the Desktop App, or any of the other tools Egnyte provides for document upload.
If you’ve captured all of the document metadata in a spreadsheet or other file, it is a good idea to upload that file to Egnyte as well.
Step 3: Create Document Categories
If you haven’t already done it, you’ll want to set up document categories. Document categories organize your documents and allow you to control permissions in the Controlled Document Management app. Each category can have one or more subcategory; most companies create subcategories for different document types, e.g., SOPs or work instructions.
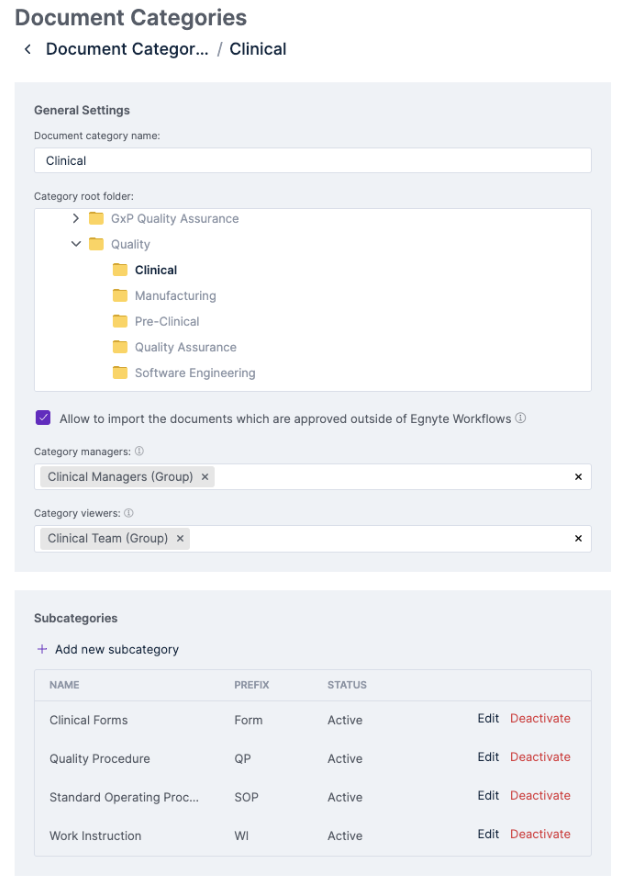
Make sure that the checkbox that allows document import is checked, otherwise you won’t be able to import existing documents into the category.
You can add Egnyte groups (either managed in Egnyte or imported from your identity provider) to give permissions to both managers (who can add new documents, view obsolete documents, and assign training) and viewers (who can only view effective and future effective documents).
Learn more about category and subcategory setup on the Egnyte Helpdesk.
Step 4: Importing Documents into Controlled Document Management
Now that all of the prep work is done, you can import your documents. Make sure that the documents you’ve uploaded are in the folders associated with your categories. For each document, e.g., SOP-12, you’ll want to import the documents in order from the first version through the currently effective version.
You start by selecting “Import to Controlled Documents” from the document context menu:
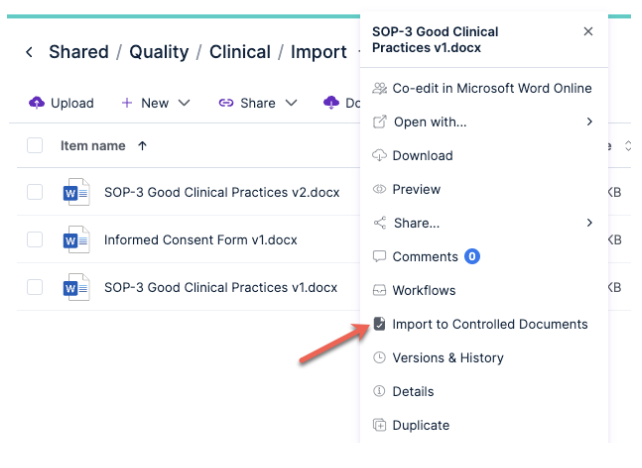
If you don’t see that option, then the file isn’t in a folder associated with a Controlled Document Management category.
In the import dialog, enter the metadata for the document that you captured from your previous system.
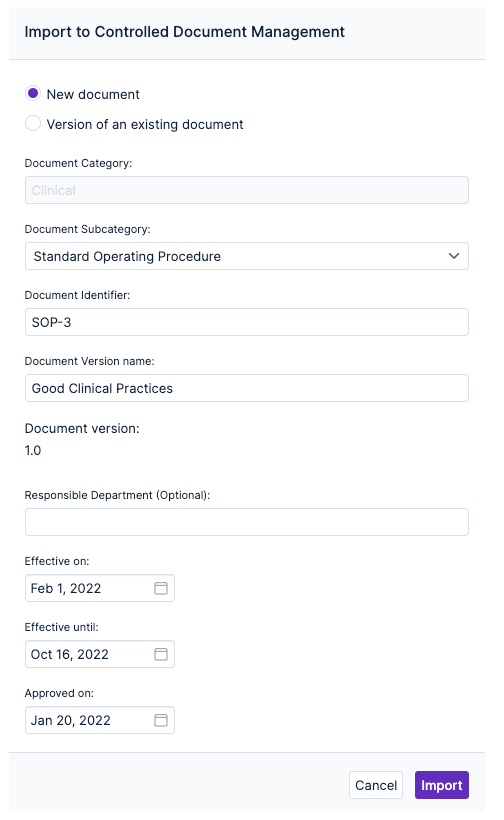
All fields except for the Responsible Department field are required. Once you’re ready, click the “Import” button and the document will be added to the Controlled Document Management app.
Use your Imported Documents
Now that your controlled documents are imported you can release them to your users. Users added as “Category viewers” will be able to see the currently effective documents in the category while “Category managers” will see both the effective and obsolete/superceded documents for the category. If you have the Learning Management module, you can also assign documents for training.
Learn more about Controlled Document Management on the Egnyte Helpdesk.