Organize and Access Construction Photos Faster with Smart Upload
Your project teams take hundreds, if not thousands of photos every year. And while it’s easy to take the actual photos, it can be a huge pain to download and organize all those images.
Think about how most companies operate today. A team member takes a bunch of pictures, goes back to the office or the trailer, downloads the pictures from the camera or mobile device, uploads them to the system, and then organizes and posts them. And if that person forgets to upload the images right away, they’ll likely be scrambling hours later to remember the exact location where they took the picture.
Extend that process across multiple locations or projects, and it can be really challenging—and confusing—to make sure everything is in the proper project folder. As a result, so much time and energy is wasted, and there’s no guarantee the images even end up where they’re supposed to.
That’s why Egnyte is including its new Smart Upload feature as part of its AEC package, at no extra cost, starting in June. Smart Upload links project folders to geolocation, so photos taken on site are automatically associated with the right folder. All you have to do is confirm the images you want to include, click Upload, and they’re automatically sent to the right folder.
Not only does this save you the hassle of going to the trailer or office to move photos around, it also ensures the images are immediately available to anyone else who needs to view them. And with Egnyte’s simple folder structure, they are all kept in the right place and easy to find.
Let’s see step-by-step how easy it is to configure and use Smart Upload.
Setting Up Smart Upload
For those of you familiar with Egnyte, there is only one additional step required to enable Smart Upload. But for all of those out there who might not be as familiar, we’ll walk through all three steps.
Step 1. Find (or Create) the Folder
To start, create a new project folder. (If the project folder you want to use already exists, you can skip down to Step 3.) Simply go to the top of the page and select New and click on Folder. If you already created folder templates, you can select them here and your folder will automatically be pre-populated. Then, name your folder.
Step 2. Create a Project
Go back to the top of the page and select the down arrow for More. This gives you the option to mark the folder as a project. Once you click on that you can select your project status, as well as start and end dates. Select Done.
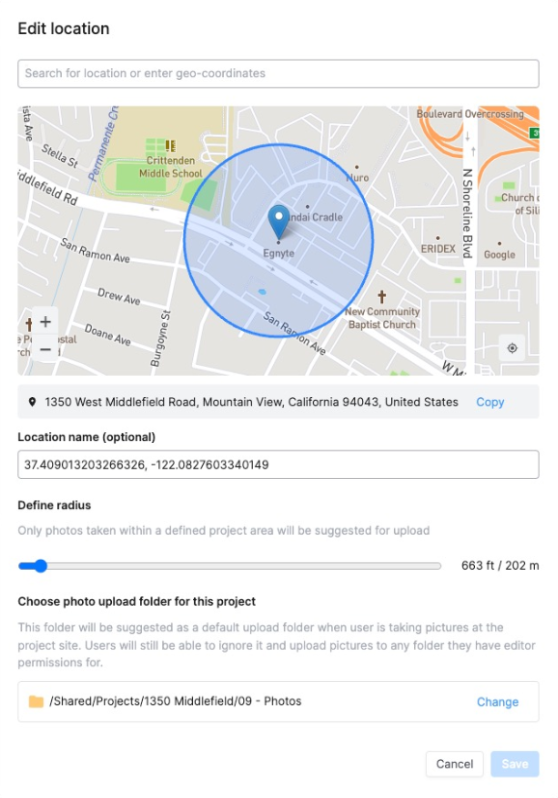
Step 3. Set Your Location
Go back to More and select Project Settings. You will now have a new tab that says “Locations.” Click on that tab and it will ask you to share your current location, which is handy if you are at the project site. If you prefer, you can also type in the address of a different location and name it.

Next, click on the slider to set the desired radius from that location. What that does is geofence the location with a virtual perimeter. Any images that are taken within that radius will be associated with that project folder. Select the destination folder for your images and click Save.
How to Use Smart Upload in the Field
What’s great about Smart Upload is it uses your mobile device, so you don’t have to go back to the office or trailer to upload images. Here’s how your team would use it.
Step 1. Take your Picture
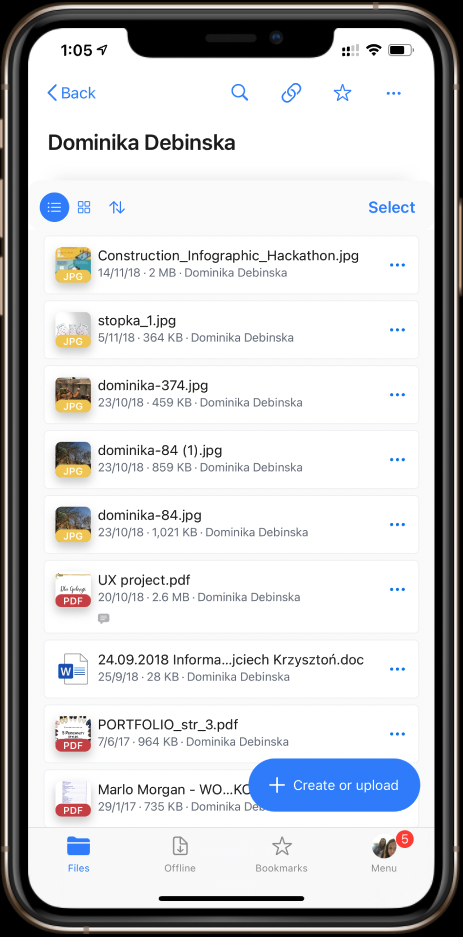
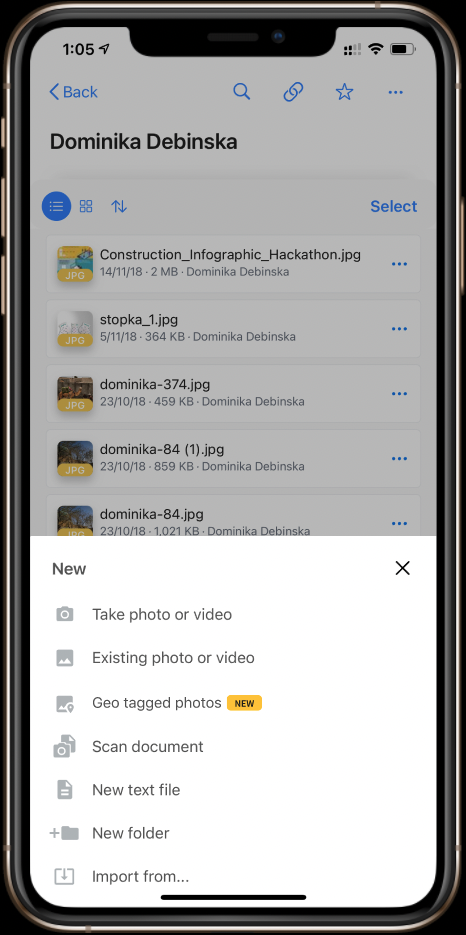
This part is fairly self-explanatory. Simply take the picture as you normally would with your smartphone. Or you can take a photo or video directly from Egnyte by selecting Create or Upload.
Then select Take photo or video.
Step 2. Upload the Image
When you open Egnyte’s mobile app you’ll receive a prompt saying you have photos that were taken in a location that matches one of your projects. Within that prompt, click on Smart Upload. If you have multiple projects with images that need to be uploaded, you’ll be given the choice to upload them all at once or project-by-project.
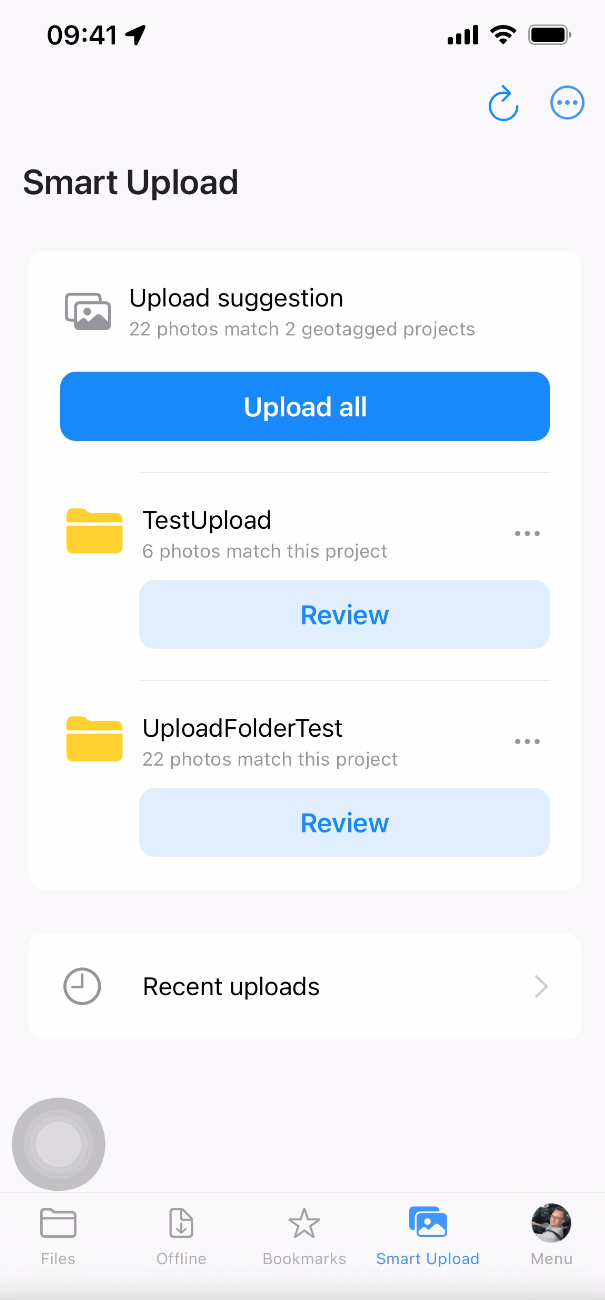
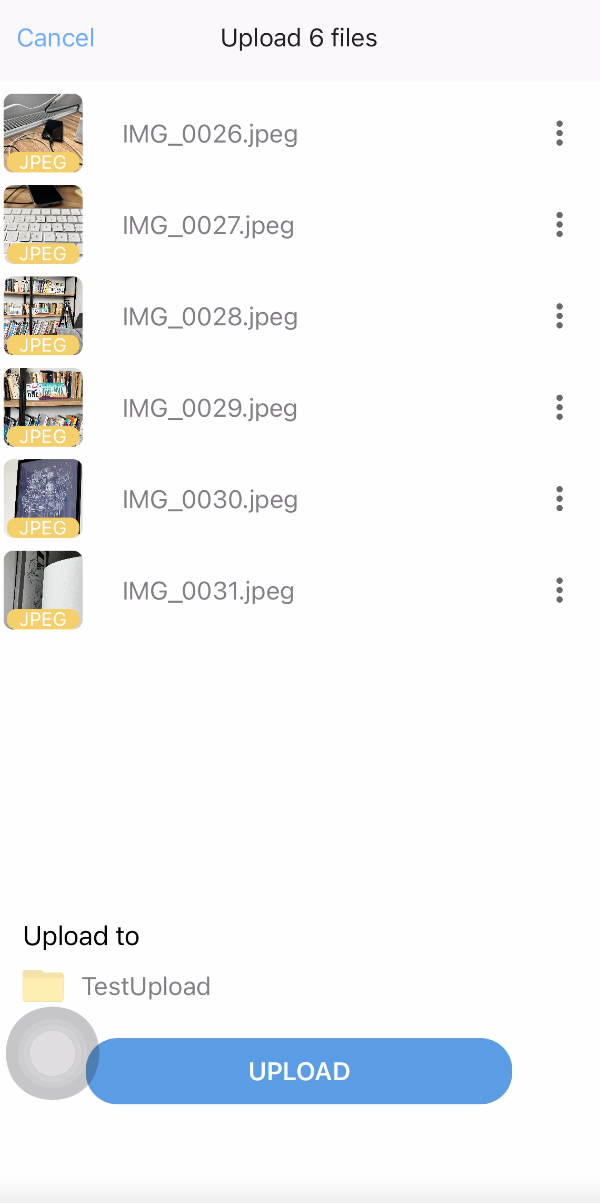
Step 3. Confirm the Images and Upload Your Images
Here you have the option of reviewing your images to see if there are any you would like to remove prior to uploading. There’s no limit on the number of images you can upload. Click Upload and they will start being sent to the proper folder.
Get Started with Smart Upload
That’s it. Egnyte takes the administrative pain out of downloading and uploading images by making it fast and simple to get the photos to the right folder. Your team will spend less time moving images and the people who need those images will get them faster, putting you in position to deliver projects on time and on budget.
To experience Egnyte for AEC for yourself check out our new product tours or go to www.egnyte.com/aec.
Share this Blog
AUTHOR