Setting Up a New eTMF Study in Egnyte
Egnyte’s eTMF allows you to assemble all the critical documentation related to your clinical trial so that you stay on track and audit-ready. Running your own eTMF gives you full visibility and control over data that is critical to the success of your company.
In this article, you’ll learn how to set up a new study in Egnyte’s eTMF app.
Why Use an eTMF App?
A TMF is really just a collection of documents - office documents, PDFs, emails, and the myriad documents that cover the conduct of your trial. So why not just store these on a file server?
Because using a purpose-built eTMF application allows you to stay on track and aligned to industry standards and timelines. You’ll be able to guide your team to collect the right documents at the right time and you’ll have the tools at your disposal to safely manage those documents, providing secure access to your team, your CRO(s), and auditors.
Setting Up a New Study in Egnyte?
Take the following steps to set up a study in the Egnyte eTMF app.
Step 1: Create the Study
The first step is to create a new study. Egnyte's eTMF app can support multiple studies, each with independent access permissions. When creating a new study you’ll need to provide a few details. Some of these are informational only, while others control how the eTMF is initially configured.
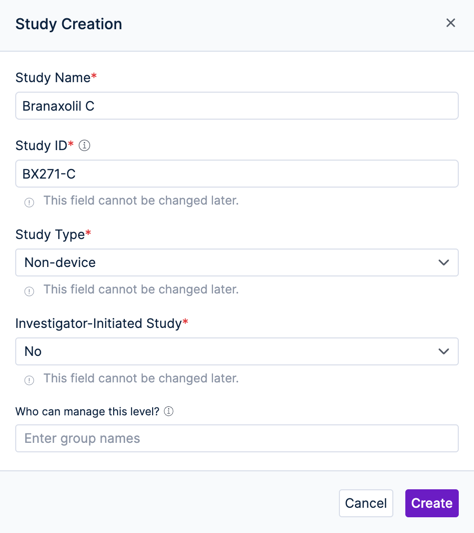
- The Study Name and Study ID will help you to identify the study in the app
- The Study Type and Investigator-Initiated Study options will determine which TMF artifacts (document types in the TMF Reference Model) will be selected by default for your study. The reference model has rules of which artifacts are “core” for different study types, and Egnyte builds that logic into the app to get you off to a good start.
- The Who can manage this level? option lets you specify an Egnyte user group who can be assigned as Study managers.
Step 2: Configure Required Artifacts
While the app preconfigures required artifacts based on the TMF Reference Model, you may want to modify the configuration to include additional artifacts, remove defaults, or even add custom artifact types.
Open the Artifact Configuration tab in the Study Configuration to choose which artifacts are required at the trial, country, and site-level. The app shows the reference model recommendations and allows you to filter and search the hundreds of artifacts to make your selections.
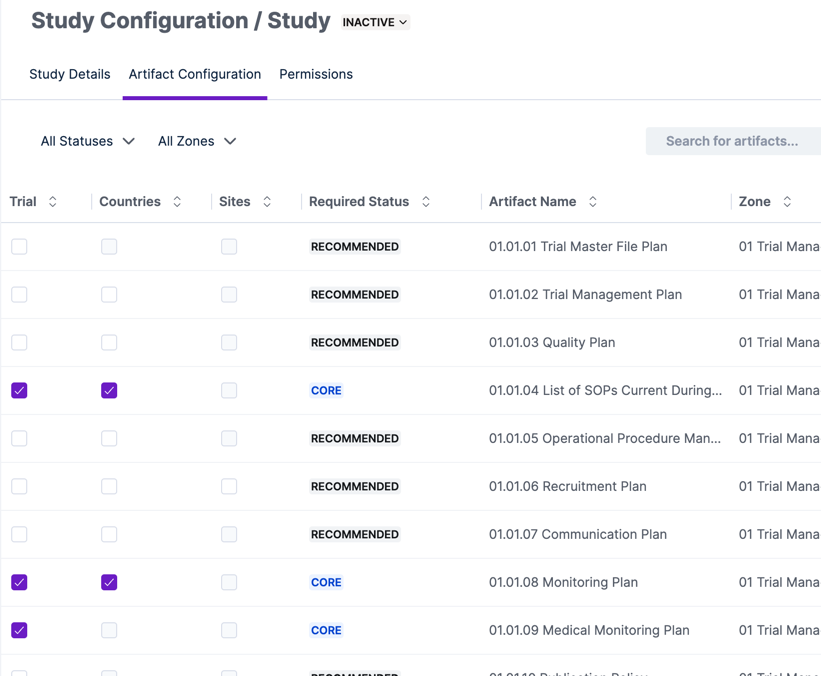
You can always come back to Artifact Configuration later if you change your mind on which artifacts are required for your study.
Step 3: Add Countries
The next step is to add the countries in which you will conduct your trial. You do this by first selecting the Trial in the Configuration screen and opening the Countries tab.
Use the Add a new country button to bring up the new country form and fill it out. Choose the country from the list and optionally fill out contact information. Repeat this for each of the countries.
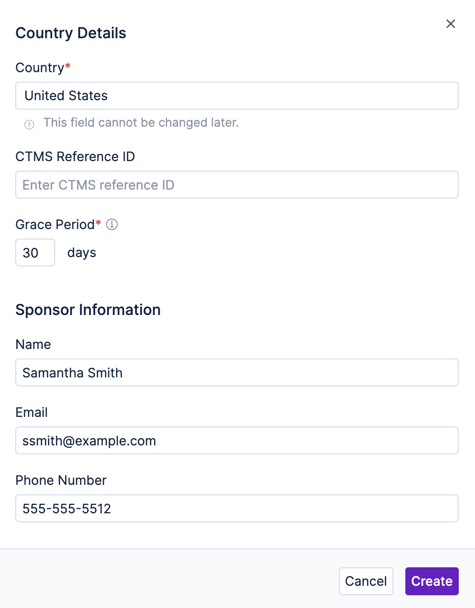
You’ll notice that the study hierarchy is updated with the country codes for your selections. You can select a country in the hierarchy to update its settings and change permissions.
Step 4: Add Sites
Once your countries are set up, you can add your sites. The process is very similar to adding countries. This time you’ll select the country associated with the site in the study hierarchy and navigate to the Sites tab.
Use the Add a new site button to bring up the new site form and fill it out. Give a name and ID to the site and optionally enter contact information for the site. Repeat this for each of the sites in your study, making sure you enter the sites in the right country.
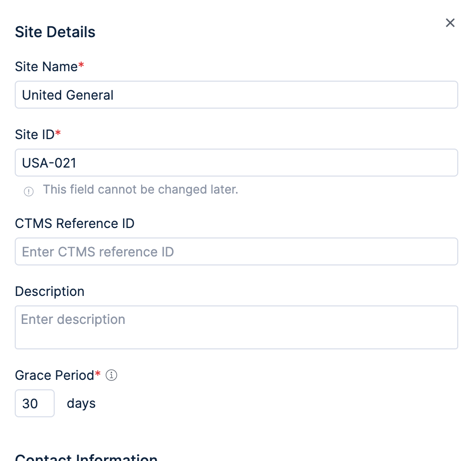
The study hierarchy will show each added site nested under its associated country. You can select the site in the hierarchy to update its settings and change permissions.
Step 5: Activate Your Study
The study, trial, countries, and sites are initially created in an inactive state. When one of these filing levels is inactive, it isn’t available to your end users and they won’t be able to upload documents or view status. This gives you an opportunity to set everything up fully before providing access to your users.
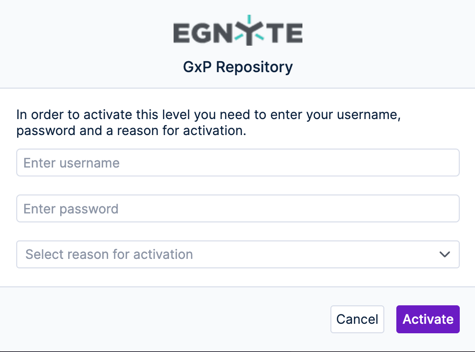
To activate the study or any of the filing levels in the study hierarchy, choose that item in the hierarchy and use the dropdown next to its name to change the status to active. The system will prompt you to provide a 21 CFR Part 11 compliant digital signature that will be tracked in the eTMF audit report.
Step 6: Activate Filing Level Milestones
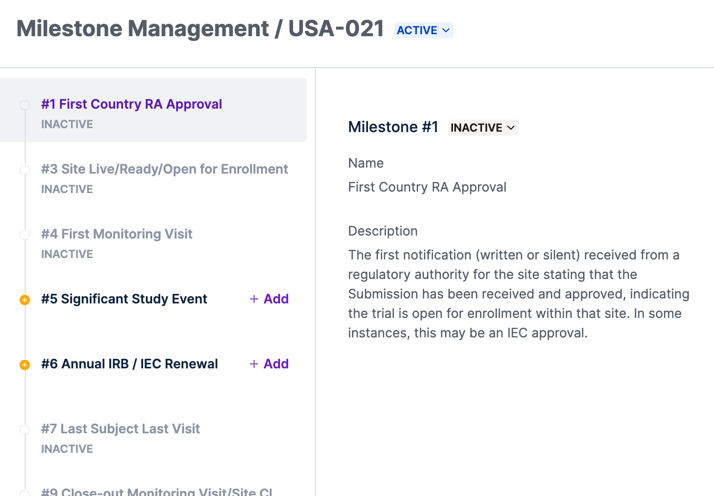
The Egnyte eTMF app uses the TMF Reference Model Milestones as a way to track the progress for each filing level and determine which artifacts are needed at a given point in time. Before you can upload files you need to activate these milestones.
Choose Milestone Management in the left navigation and then select the relevant filing level. From here, you can choose a milestone and change its status from Inactive to Active. As with activating a filing level, you’ll need to provide a digital signature to proceed.
Start Using your eTMF
With just a few clicks, your study hierarchy is set up, artifact configurations defined, and milestones activated, and now you’re ready to start uploading documents to the eTMF App. Your users will see the lists of required documents for each filing level. They can upload files, while you track progress, search and view uploaded documents, and view audit history for all changes to ensure that your trial stays on track and inspection ready.
Share this Blog
AUTHOR

PRODUCT ARTICLES